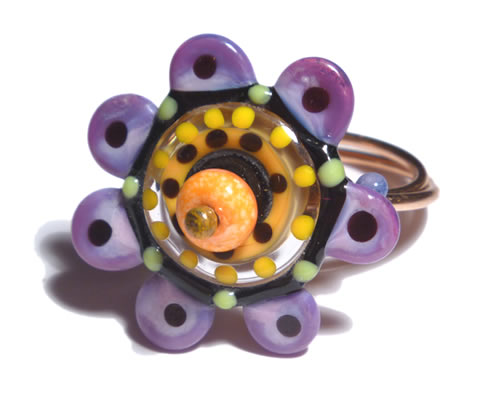
Make a Simple Ring with a DesertBug Designs "Topper" Bead!

Here is a simple and lovely ring design that is perfect for any of my flower or topper style beads, or even a "Fun Flats" set!
|
|
|
Instructions
Click on any picture for a larger view...
 |
STEP 1:
Gather all of your materials and tools together.
|
 |
STEP 2:
Wrap the 14 gauge copper wire around the ring madrel ortube to your ring size. Don't worry about being to accurate, we are striving for an organic look. |
 |
STEP 3:
Once you have two nice wraps, clip the copper wire flush to form your ring. Test for fit on your finger, and adjust if needed. |
 |
STEP 4:
String your head pin with 1 spacer bead and 1 topper or flower bead. Start wrapping the remainder of the headpin around the middle of your copper ring, centering it over the area where the two ends are. |
 |
STEP 5:
Take your piece of 20 gauge wire and wrap it around and around the headpin and wire rings, locking under the cut ends, or if they are
decorative, situating them on top. Keep wrapping until the beads are nice and tight, and all the wire is wrapped. |
 |
STEP 6:
Tuck in any wire ends, and check for fit. Adjust if necessary by squeezing any wires into shape with a flat nose pliers.
|
 |
STEP 7:
Your ring is now finished, and ready to wear! Remember, you can always change this guide to suit you taste, adding different wire material instead of copper, using a larger or smaller central bead, just let your imagination run wild!
|
 |
|
| |
|
| |
|
Back
to the Main Tips & How-to's Page
|
Lampwork and fusing work can both be dangerous if not properly
undertaken, and you should take care to inform yourself of all safety issues/precautions/and
risks associated with these endeavors.
All instructions/photos on this page are copyrighted
by DesertBug Designs/T. Ryan and have all rights reserved.
This material may not be published, broadcast, rewritten, or redistributed
in any form without express written permission of DesertBug Designs/T. Ryan.
|


